Categories
Special Ocasion

Pink Onigiri

Rice balls with hummus filling

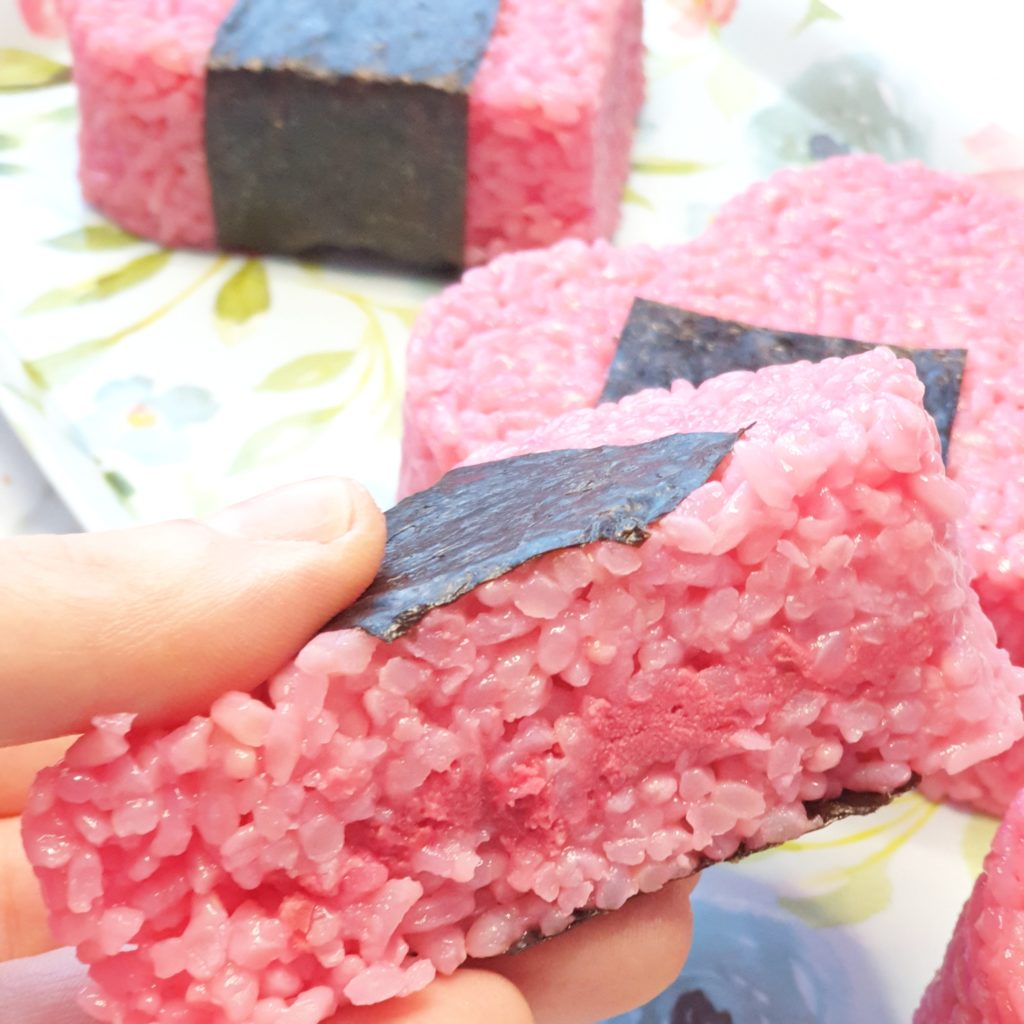
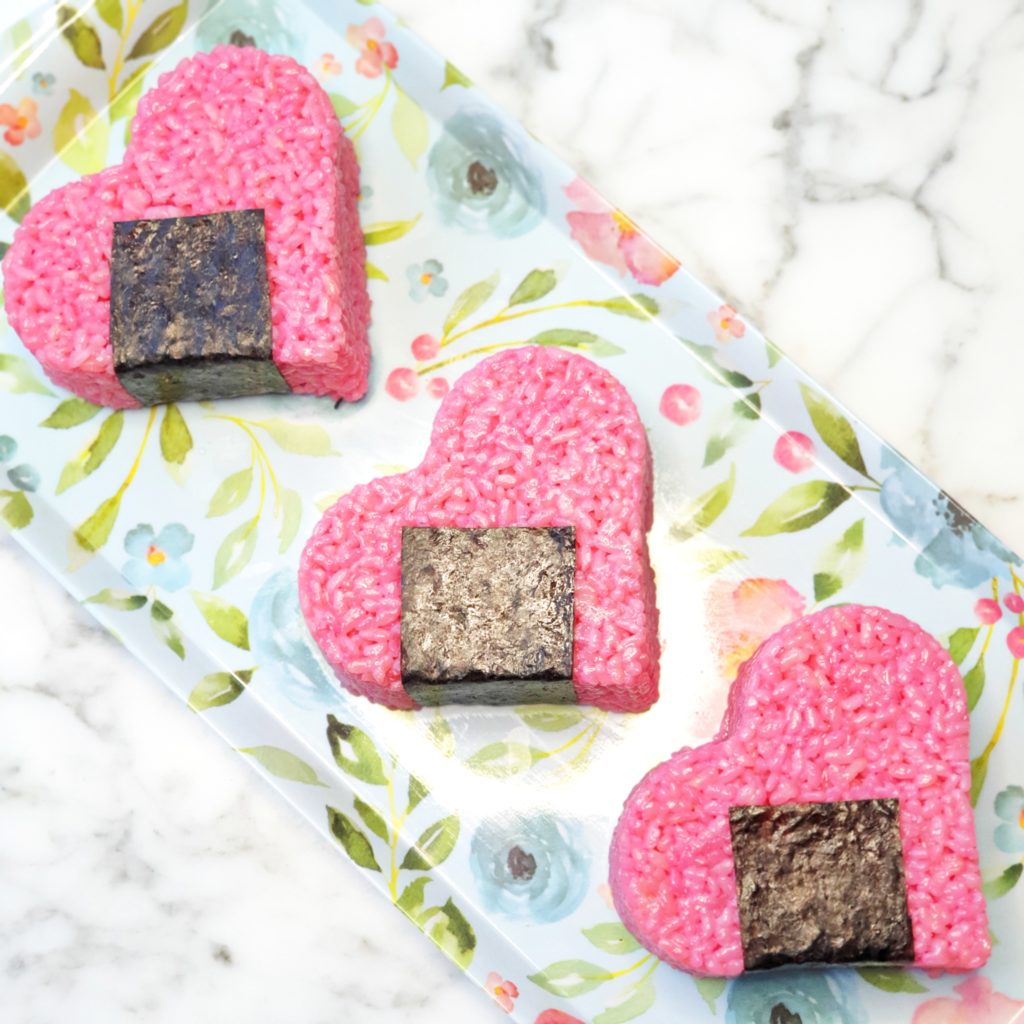
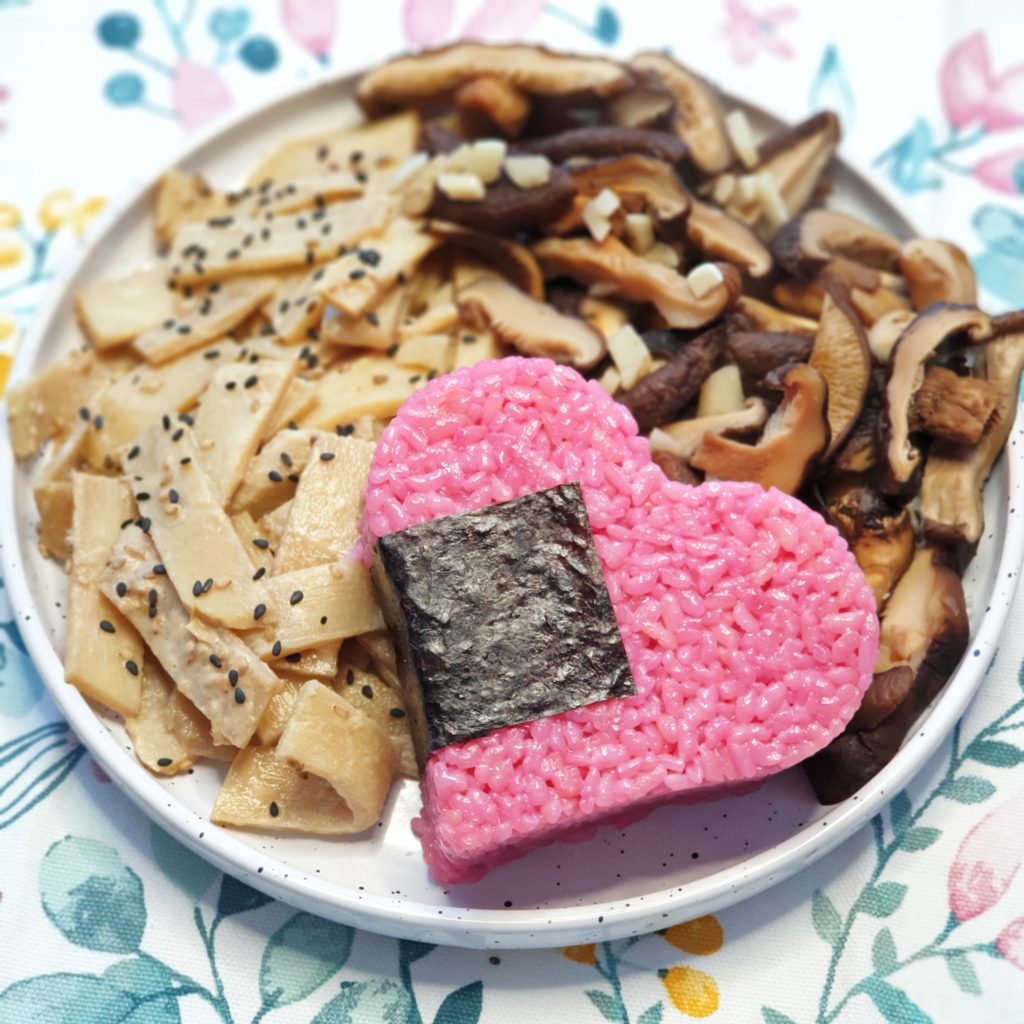
Maybe you are in need of a bit of Valentine’s Day inspiration? This savory snack is great: sushi rice tastes awesome, it’s meant to be consumed cold and can be easily packed and eaten on the go. A perfect combination.

It doesn’t have to be pink or heart shaped and there are many inspirational photos on Google for shaping and placing the nori. This recipe makes 4 servings, 4 hearts about 1 cup each in my case, plus leftover hummus.

Rice
🍙250g sushi rice
🍙2 tbsp beet juice
🍙1/2 cup rice vinegar
🍙1 tsp salt
🍙1 tbsp white sugar
🍙1 or more sheets of nori

Hummus
🍙2 cups cooked chickpeas
🍙1 lemon juiced
🍙1 medium beet, grated and squeezed
🍙1/2 tsp salt
🍙3 tbsp tahini
🍙1/4 cup water or more

I had mine on their own on the go and also paired with tahini covered bamboo slices and garlic Shitake mushrooms.
  1. Start cooking the rice and mix in a bowl the vinegar, salt and sugar until disolved.
  2. In the meantime, put all the hummus ingredients in a blender. The consistency should be thick paste like, not too wet.
  3. Allow the rice to cool for 10 minutes, then fold in the vinegar mixture and 2 tbsp beet juice that was left from squeezing the grated beet for the hummus.
  4. Scoop and shape the rice in 2 steps, sandwiching 1-2 tbsp of hummus in the middle.
  5. Always handle the rice with slightly wet or oiled hands or utensils. Use a wet/oiled mould or plastic wrap to shape.
  6. Finally, wrap with the nori. I used small rectangles, but it’s optional. Parchment paper or plastic wrap can be used to prevent sticking instead.
  7. Store the leftover hummus in the freezer. Enjoy!
Categories
Dessert

Daifuku Mochi

Sweet rice cakes with Azuki bean filling

I love mochi. It’s so easy to make too. You just need the right flour, but it’s easy to find on Amazon or at an Asian grocery store. So give it a try!

Red Bean Paste
🌱65g Azuki beans
🌱1/4 cup dates (50g)
🌱1/4 cup soy milk or liquid
🌱4 tbsp coconut butter*

Mochi
🌱1 cup glutinous rice flour
🌱1 cup water
🌱1/4 cup white powdered sugar or more
🌱~1 cup starch for handling the mochi

Coloring (optional)
🌱2 tbsp beet juice (squeezed from grated beet) for pink OR
🌱1/4 tsp turmeric powder for yelloe OR
🌱1/2 tsp spirulina powder for green OR
🌱1/2 tsp blue pea flower tea powder for blue

  1. Cook the beans and then blend with the rest of the ingredients. Use more liquid if necessary, but eliminate it afterwards by heating the paste in the microwave. It should be easy to form balls with little of it sticking to fingers.
  2. Roll the paste into balls using a measuring spoon to have them all the same size.
  3. Place them on a plate without touching and freeze them. It’s more convenient if you make them the day before.
  4. Take the bean balls out of the freezer, then start preparing the mochi.
  5. In a glass bowl that you can cover, whisk all the ingredients except the starch + coloring, if you’re using any. I used 2 small glass containers, one flipped on top of the other so that not much moisture could escape.
  6. With the bowl covered, heat for 2 minutes and mix with a spoon.
  7. Heat again in 30 seconds stages, checking and mixing between each. If you’re using coloring, it will be easier to distinguish if there are uncooked areas. It should take anywhere between 2.5 and 4 minutes, depending on the microwave. Mine cooked it fast. If it’s a thick sticky mass that holds together, it’s done.
  8. Dust the work surface and utensils with starch and dump the mochi while hot.
  9. Cut the mochi in equal parts depending on your filling size and close it around it. For balls 1 tbsp in size, I divided the mochi in 16 pieces.
  10. Flatten the mochi with starch covered hands, place the beans and pinch it shut. Have more starch on hand. Starched silicone mats work well as a work surface.

*Plain mochi taste just as good, but you might like to add a bit more sugar.
*I don’t recommend doubling up the recipe for the mochi. It’s better to cook one batch at a time.
*You can make coconut butter by blending coconut flakes.